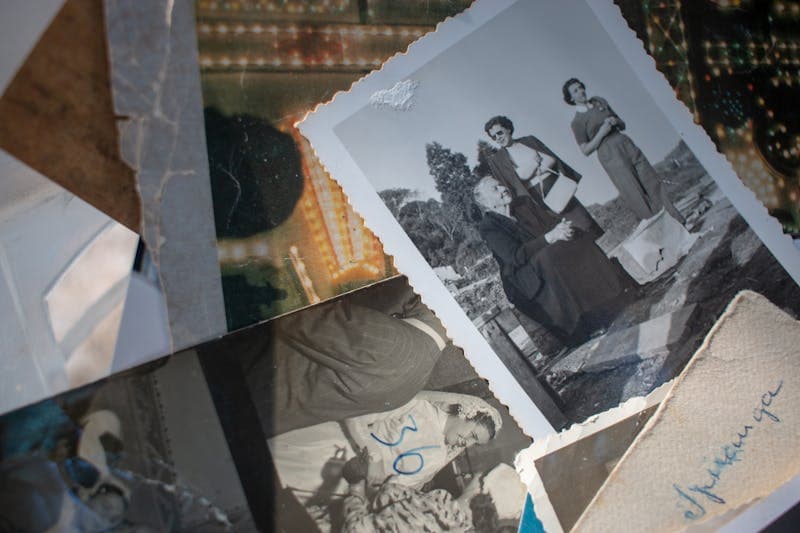
An AI colorizer does not know what colour your grandmother's dress was. It knows what colour dresses in photographs like that one usually are, and it paints that. Most of the time the guess is close enough that the photo stops looking like history and starts looking like a person. Some of the time it is confidently wrong, and the wrong version looks exactly as convincing as the right one.
That second part is what interests me. I test software for a living, and the failure mode I spend the most time on is the one where the output looks fine. Colorization is that failure mode in picture form. This post covers what the model actually does, how to give it a scan it can work with, which tools I would try first in 2026, and the one habit that keeps a colorized photo honest: check something in it you already know.
It is a statistical guess, not a recovery
The training recipe is simple. Take millions of colour photographs, convert them to greyscale, and train a network to predict the original colours from the grey version. After enough examples it has learned which grey values and textures tend to go with which colours: that texture is foliage, so green; that flat bright area at the top is sky, so blue; that skin in that light is one of a narrow band of browns and pinks.
Newer models (diffusion models, and before them conditional GANs) produce more varied and more natural output than the first generation, and some can give you several plausible colorizations of the same photo. That variety is the honest part of the technology: it is admitting the answer is not in the input.
Because it is not. A greyscale car tells you its shape and how bright the paint was. It does not tell you red from dark green. The model picks the most probable colour for a car of that era in that kind of photo, and probable is not the same as true. The output is a well-informed guess, and nothing in the image tells you which guesses were wrong. Treat it that way from the start and the rest of this post follows.
Give the model a scan it can use
The result is only as good as the greyscale going in. A phone photo of a print, taken at an angle under a lamp, gives the model a blurry, uneven image and it will colorize the blur.
- Scan at 600 dpi or higher. Fabric texture, hair, the pattern on a tablecloth are what the model reads to decide on a colour. A 150 dpi scan throws that away.
- Repair damage first. The model does not know a scratch from a scar. A fold across a face gets colorized as part of the face. Retouch tears and stains before colorizing, not after.
- Fix the contrast. A faded print has its whole range squeezed into mid-greys, and the model reads mid-grey as dull everything. Stretch it so the shadows are dark and the highlights are light.
- Crop the border. Album corners, tape and the white edge of the print are noise the model will try to colour. The image cropper does that in the browser without uploading the scan anywhere.
Two more small things. Most colorizers want PNG or JPEG; the image format converter turns a TIFF from the scanner into either. And if a service has an upload limit, the image resizer brings the scan down to it. Downscale only. Scaling a small scan up adds pixels, not detail, and the model cannot colour detail that is not there.
Tools worth trying in 2026
I have not used every one of these on a real family archive, so take this as a shortlist to try, not a ranking.
- MyHeritage In Color. The easiest route for family photos. Upload, wait a few seconds, download. A handful of photos are free, then it is behind a subscription. Results lean warm and pleasant, which is what most people want from a picture of their grandparents.
- DeOldify. Open source, runs locally or through hosted notebooks, with a "stable" model that stays conservative and an "artistic" one that pushes colour harder. The project has not seen much development in years, but it still runs and it still costs nothing, which matters if you have three hundred scans and not three.
- Palette.fm. Colorizes from a text hint, so you can steer it: "1960s Kodachrome", "overcast Dutch afternoon", "muted pastels". Free at low resolution, paid for full size. The steering is the reason to use it; when you know the era, tell it.
- Adobe Photoshop, Neural Filters, Colorize. The right choice when you intend to correct the result by hand afterwards, because you are already in the editor. Needs the subscription.
- Models on Replicate or Hugging Face. For anyone building colorization into their own pipeline. More control, more setup, and you are responsible for the quality.
Whichever you use, keep the original scan and the full-size colorized output untouched. Run copies through the image compressor for sharing; the compressed file is for email and family chats, not for the archive.
Getting a better result than the first pass
One click gets you a plausible photo. A good one takes a few more steps.
- Tell the model the era when the tool allows it. A uniform from 1944 should come out in one specific drab, not in whatever the model saw most often. Context narrows the guess.
- Colorize a person and a busy background separately when the model gets one of them wrong. Crop, colorize, recombine. It is more work and it is often the difference between a good face and a good photo.
- Run the same scan through two tools and compare. One gets the sky and loses the coat. The other gets the coat. Take the best of each in an editor.
- Correct the things you know. Skin tones drift towards one narrow range, flags and logos come out in the wrong colour, shadows and reflections confuse every model. This is where a known fact beats any amount of compute.
The check I would build into the habit: before you trust a colorized photo, find one object in it whose colour you actually know, and see what the model did with it. A house that is still standing, a car someone still remembers, a school uniform. If the model got that one wrong, assume it got others wrong too, quietly. If it got it right, you have one data point, which is one more than the model had.
One click gets you a plausible photo.
Say that it is colorized
A colorized photo makes an event feel present in a way the grey original does not. That is its value and its problem. The colours carry the same confidence as the shapes, and the viewer has no way to tell which parts were recorded and which were predicted.
So label it. "Colorized with AI" on a print for a relative, in a caption on a family site, on the back of the frame. Show the original next to it when you can. This is not about spoiling the gift. It is about the version of events that gets told in twenty years, when nobody remembers the photo was ever grey and the blue dress has become a fact.
For anything published or sold, disclose it every time. For photographs that matter to a community or a family beyond your own, ask before you colour them; some people have opinions about how their history should look, and they are entitled to them.
On rights: in the United States, works published before 1931 are in the public domain as of 2026, and the cutoff moves forward a year each January. Elsewhere the rule is usually the photographer's life plus seventy years. Your colorized version may or may not count as a new work depending on where you are. If you did not take the photo and you intend to publish the result, find out who did before you do.
Printing it
A colorized photo on a screen is lit from behind and looks richer than the same file on paper, which only reflects light. Expect the print to be a little flatter, and choose accordingly.
- Resolution. A 20 by 25 centimetre print (8 by 10 inches) at 300 dpi needs roughly 2400 by 3000 pixels. If the colorized file is smaller than that, go back to the scanner rather than enlarging the file; enlarging invents pixels and the print shows it.
- Colour space. Screens are RGB, presses are CMYK, and some bright blues and greens do not exist on paper. A soft proof in CMYK in your editor shows what will survive before you pay for the print.
- Paper. Glossy gives stronger colour. Matte suits old photographs; it looks like the print your grandparents would have had. For a photo you intend to keep, pay for archival paper.
- Use a lab for the ones that matter. Calibrated printers, better paper, and someone who will reprint it if the skin tones come out orange.
- Keep the uncompressed file for printing. Compression removes exactly the detail that shows at 300 dpi. Compress for sharing, print from the original.
A colorized photo on a screen is lit from behind and looks richer than the same file on paper, which only reflects light.
FAQ
How accurate is AI colorization?
Good on skies, plants and skin, because the training data has millions of examples of each. A guess on clothing, cars, buildings and anything else that comes in many colours. Providing the era and correcting known objects by hand improves it; nothing makes it certain.
Can I colorize a sepia or faded colour print?
Yes, and convert it to plain greyscale first. The model reads an existing tint as information about the real colours, and a sepia cast tells it everything was brown. Remove the tint, then colorize.
Does it work on very old or damaged photographs?
It runs on anything. Daguerreotypes and tintypes have little contrast and little detail, so the result is soft and often odd. Repair tears and stains first; the model cannot tell damage from content.
Is this what a human colorizer does?
No. A human colorizer researches the era, the regiment, the make of car, and spends hours on one image matching references. The model spends seconds matching probabilities. For a museum, the human. For the photo of your grandparents on the mantelpiece, the model, with one known colour checked.
Images by Pexels
AI Resume Builders: Where They Help and Fail
Learn how AI resume builders and cover letter generators work. Practical tips for standing out, what to avoid, and how to use AI tools without sounding generic.
AI Text Summarizer: Condense Long Articles for Free
Learn how AI text summarization works, the difference between extractive and abstractive methods, and practical uses for research, study, and email.
AI Face Enhancer: How Photo Restoration Works
An AI face enhancer sharpens blurry faces, removes scratches, and colorizes old photos. Learn what the technology can and cannot do, plus practical tips.
AI Image Upscaler: Enhance Low-Res Photos for Free
Learn how AI upscalers like Real-ESRGAN improve image quality, when upscaling works vs when it does not, and how to choose the right tool for your photos.